A university, an employer or a government office asks you to “upload your documents as a single PDF”. You have the papers in front of you and a phone in your hand, but no scanner. You can photograph the pages, turn them into one PDF with the free JPG to PDF tool, and check the file before you upload it, all in your phone’s browser. The photos stay on your phone.
Step 1: Take photos that will read well
The PDF can only be as clear as your photos, and a few minutes here can save you a rejected application later. On an iPhone you can also skip the photos and use the phone’s built-in document scanner instead; our guide to scanning to PDF on an iPhone shows how.
- Light: stand near a window in daylight, or under a bright ceiling light. Avoid the flash, which leaves a white glare in the middle of the page.
- Flat and square: lay the page on a dark, plain table and hold the phone straight above it, parallel to the paper. A photo taken at an angle stays at that angle in the PDF.
- Fill the frame: get close enough that the page fills most of the picture, with a little table showing around the edges. Every word should be readable when you zoom in on the photo.
- No shadows: your own head and hand are the usual culprits. Move until the page is evenly lit.
- One page per photo: for a two-sided ID card, take one photo of the front and one of the back.
Check each photo straight away by zooming in on the smallest text, such as an ID number or a date. Retake any that are blurred.
A note about iPhone photo formats
Many iPhones save photos as HEIC, while most websites, including this one, take JPG or PNG. When you pick photos from your library in Safari, the iPhone usually hands them over as JPG. If a photo is refused as the wrong type, change Settings > Camera > Formats to Most Compatible for future photos, or share the photo to yourself as a JPG first.
Step 2: Put the photos into one PDF
The conversion itself happens on our JPG to PDF page. The rest of this page is about what comes around it: the photos before, and the checks after.
- Open JPG to PDF in Safari or Chrome on your phone.
- Tap Choose images and select all the photos for this application. You can add more later with the smaller box under the list.
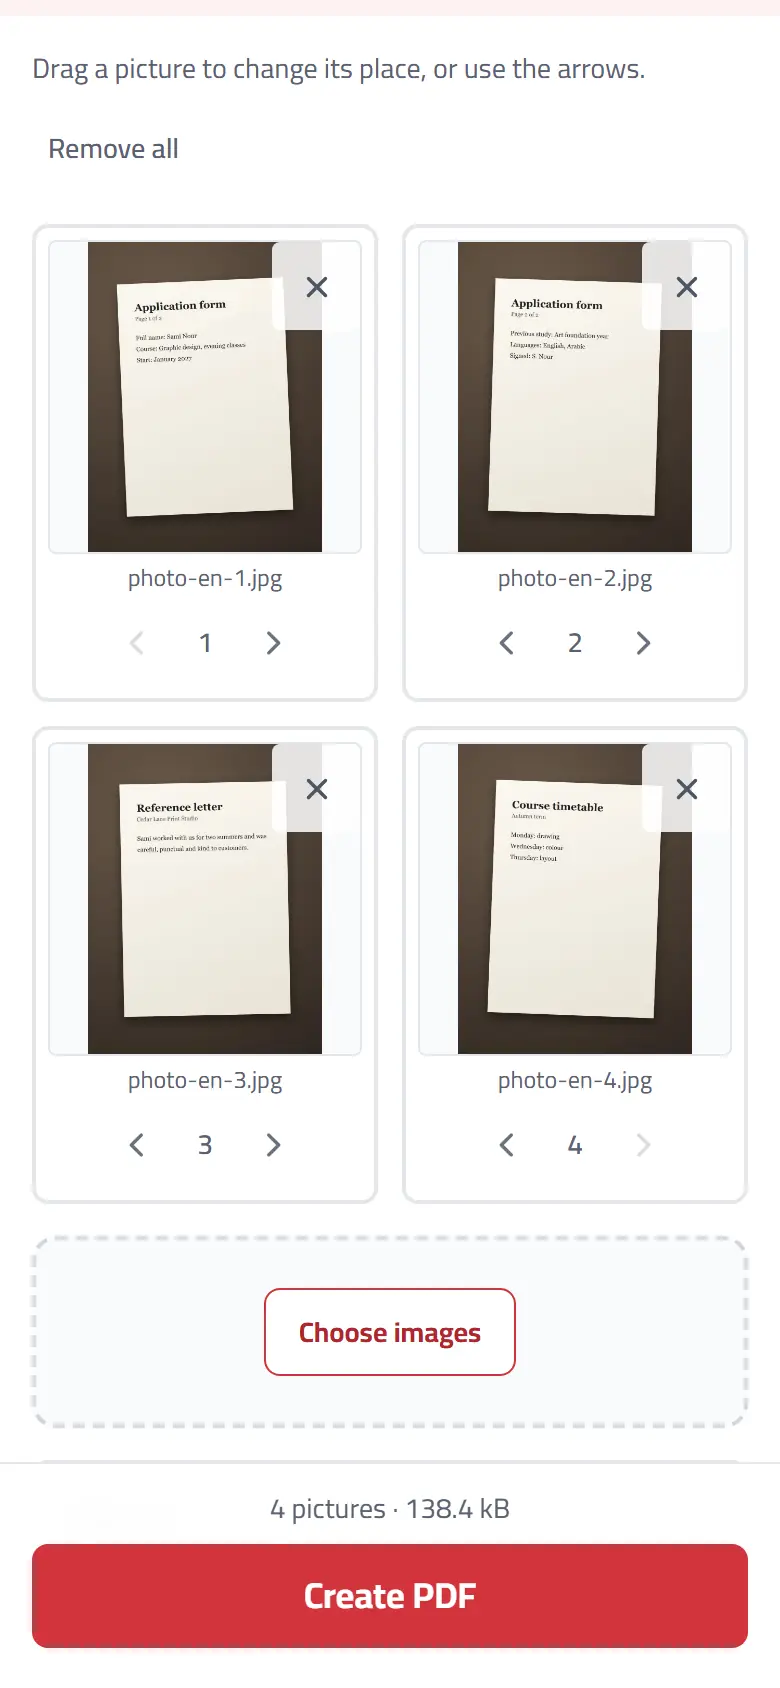
- The photos appear as a list. Put them in the order the application asks for: drag a photo to its place, or use the arrows under each one. On a phone, the arrows are often easier than dragging.
- Choose the settings (see below), then tap Create PDF.
- Tap Download PDF. On an iPhone the file goes to the Files app, in Downloads; on Android, to your Downloads folder.
The PDF is built inside your browser, and your photos aren’t uploaded anywhere.
Which settings to choose
- Page size: choose A4 (or US Letter in the United States and Canada) if the office might print the file. Choose Fit picture if the file will only be read on screen: each page is then exactly the size of its photo, with no empty space.
- Direction: Automatic puts tall photos on upright pages and wide photos on sideways pages. Leave it on Automatic unless the application asks for all pages one way.
- Margin: Small keeps the edge of each photo away from the edge of the paper, which looks tidier when printed. None uses the whole page.
Step 3: Fix what does not look right
Open the downloaded PDF and look through every page before you upload it.
- A page is sideways or upside down. Phones record which way they were held, and the tool reads that note to place each photo the right way up. If a photo was taken with the phone lying flat, that note can be wrong. Open the PDF in Rotate PDF, turn only that page, and save. If the page looks right on your phone but sideways somewhere else, see how to save a rotated PDF.
- The order is wrong. Go back with Change the pictures and move the photos, or open the PDF in Rearrange pages and drag the pages into place.
- You also have a PDF to include, such as a form you filled in on the computer. Make the photo PDF first, then combine both files with Merge PDF, in the order the application wants.
Step 4: Check the file size and the name
Many application websites limit the size of each upload, often to a few megabytes. Look at the size shown next to the download button.
This tool places each photo in the PDF exactly as it is, without shrinking it again. That keeps every page sharp, but a PDF made of large phone photos can be large too. If your file is over the limit:
- Make the PDF smaller. Open it in Compress PDF and choose “Fit under a size” with the portal’s limit, for example under 2 MB. Phone photos hold far more detail than a page needs, so they usually shrink a lot, and the tool shows the real size before you download. Zoom in on the smallest print afterwards to check it is still readable.
- Use fewer photos. Only include the pages the application asks for.
- Take smaller photos. Many Android camera apps let you choose a lower picture size in their settings. Pages photographed from closer need fewer pixels to stay readable.
- Split the upload, if the website accepts more than one file: one PDF for your ID, another for your certificates.
Finally, give the file a clear name before you upload it, such as Surname-Firstname-documents.pdf. It helps the person who opens it, and you, when you look for it again. I usually name my PDF files after the document or its subject, so they’re easy to find later. A PDF also carries a title and an author inside it, and a browser tab may show that title instead of the file name. The guide to changing the author of a PDF covers both.
What this method cannot do
Before an important application, it’s worth knowing the limits.
- It does not straighten or crop photos. There is no edge detection. If you need that, the iPhone’s Notes app and the Google Drive app on Android both have a document scanner that straightens pages as you photograph them, and they can save a PDF directly.
- It does not make the text selectable. The pages are pictures of text, so you cannot search or copy the words in the PDF. For an application, that’s normally fine. For a longer explanation, see why you can’t edit the text in a scanned PDF.
- It places one photo per page. To get the front and back of a card on one sheet, keep the page size on A4 or US Letter (not Fit picture), make the PDF, then open it in Pages per sheet and choose 2 pages. The front goes at the top of an upright sheet and the back below it, each with a small margin and a thin line around it (you can switch the line off). Each photo is enlarged to fill its half of the sheet, so a card comes out at roughly twice its real size.
- It cannot confirm what the office accepts. Some applications want a certified copy or an original on paper. Check the instructions or ask the office if you are not sure a phone photo is acceptable.
Frequently asked questions
Is it free? Yes. There is no sign-up, no daily limit and no watermark on your file.
Are my documents uploaded? No. The PDF is made in your browser, on your phone, and the photos never leave it. This matters for ID cards and certificates.
Can I do this on a computer? Yes. Copy the photos to the computer and use the same tool in any browser. You can also drag the photos straight into the box.
Why is one photo darker than the others? The camera adjusted to the light in that shot. Retake it in the same place as the others, then change the pictures and create the PDF again.
Can I add a page later? Make a PDF of the new photo, then combine the two files with Merge PDF.